The viewfinder, explained.
Everything lives on one screen. The chrome tells you what will be written before you press anything.
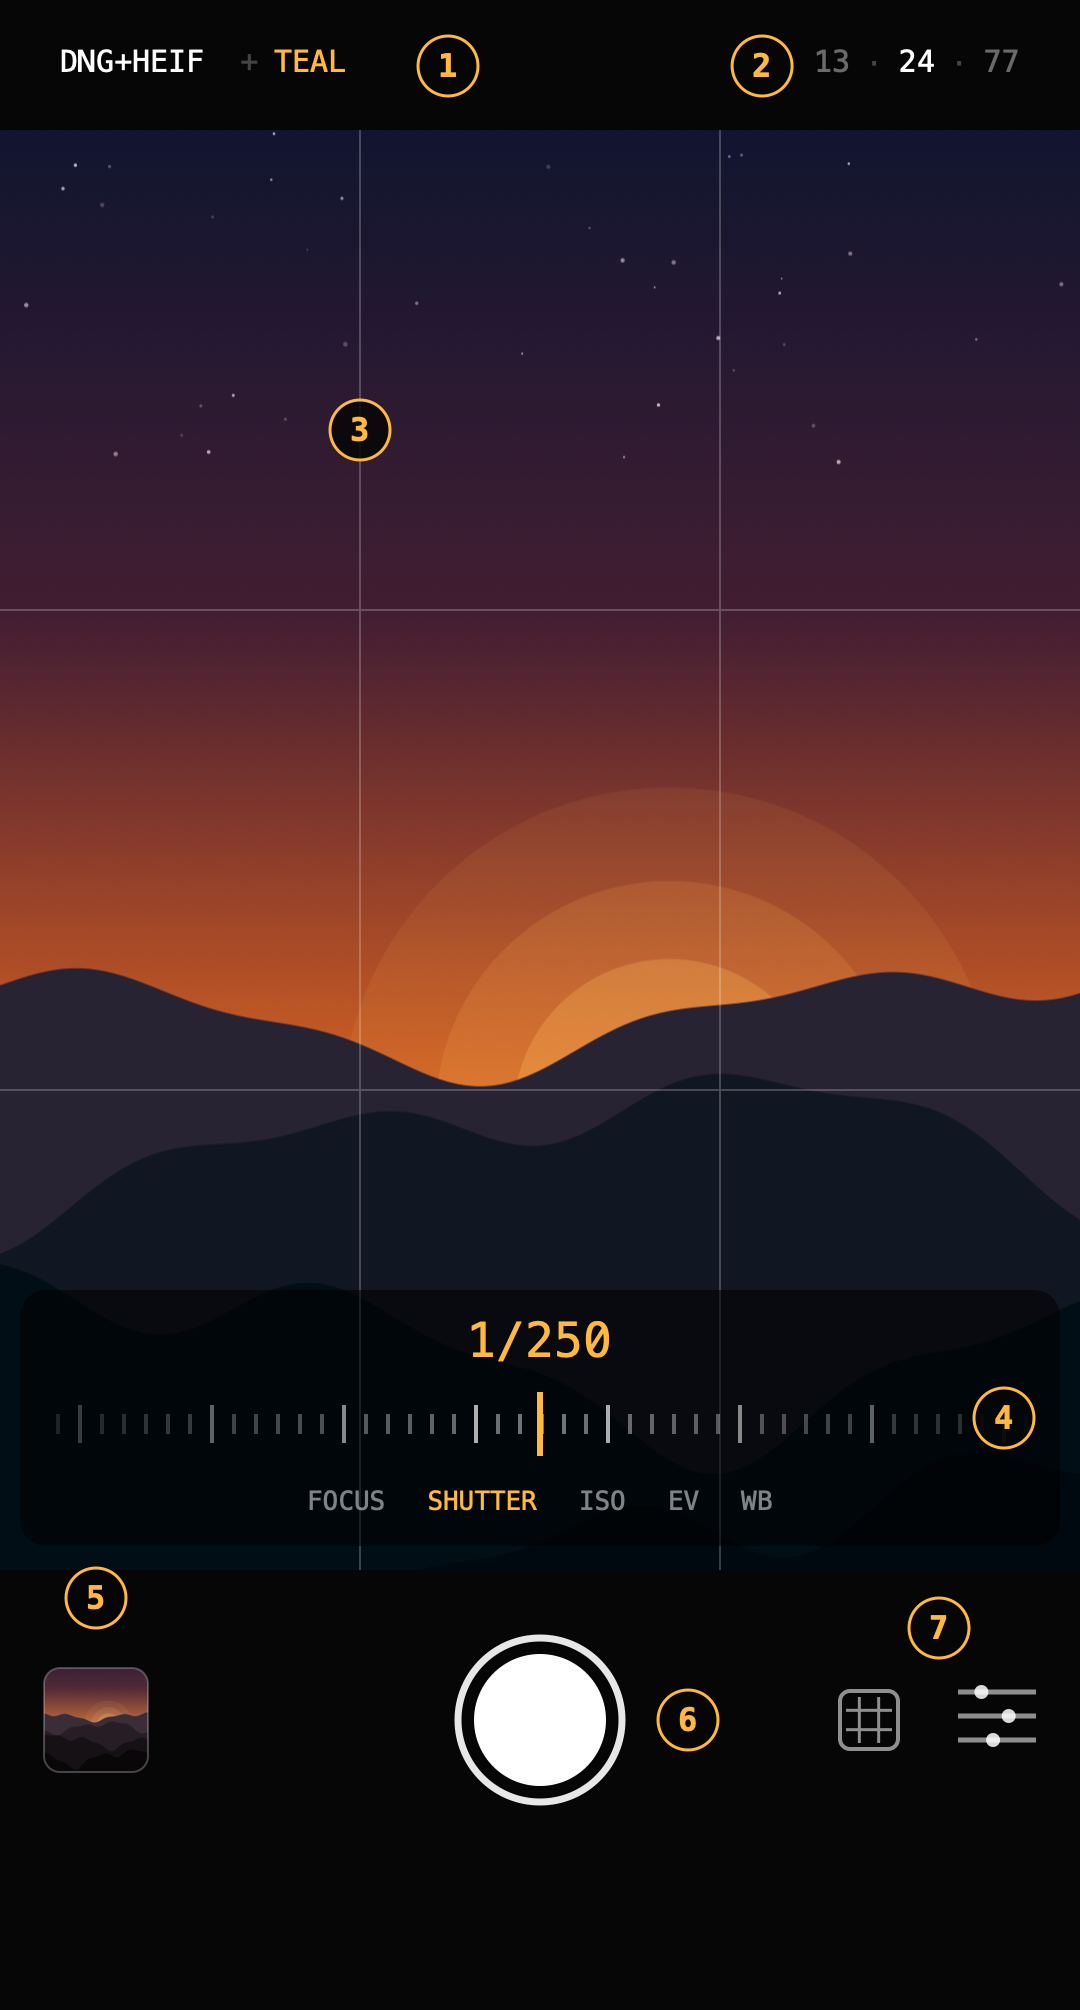
- 1The file line. What this shot will write: DNG, HEIF or both, plus the active look. It always tells the truth; if a look is on, its name is amber.
- 2The lens turret. Every physical lens on your iPhone, 13, 24 and 77 mm here, plus the front camera. There is no digital zoom, so nothing between the stops.
- 3The thirds grid. Optional composition lines, toggled from the bottom bar. If a watch is connected, the grid mirrors there too.
- 4The control dial. Pick a control on the rail, drag the ruler. The value above is the truth the sensor will use.
- 5The session gallery. Every shot from this session. Swipe through them, pinch to zoom, at full resolution.
- 6The shutter. One tap, up to two files.
- 7Grid and controls. The grid toggle and the control panel toggle.
Automatic, until touched.
Focus, shutter, ISO, exposure bias and white balance all meter automatically, like any camera. The moment you move a dial, that one value is pinned and everything else keeps metering around it. Tap AUTO to release it.
Pin the shutter and the ISO follows; pin both and you are fully manual. Below 1/15 s the viewfinder simulates the slow exposure so you see what the sensor will actually gather, and the readout warns when a pinned value pushes the meter past what it can balance.
Focus with your eyes.
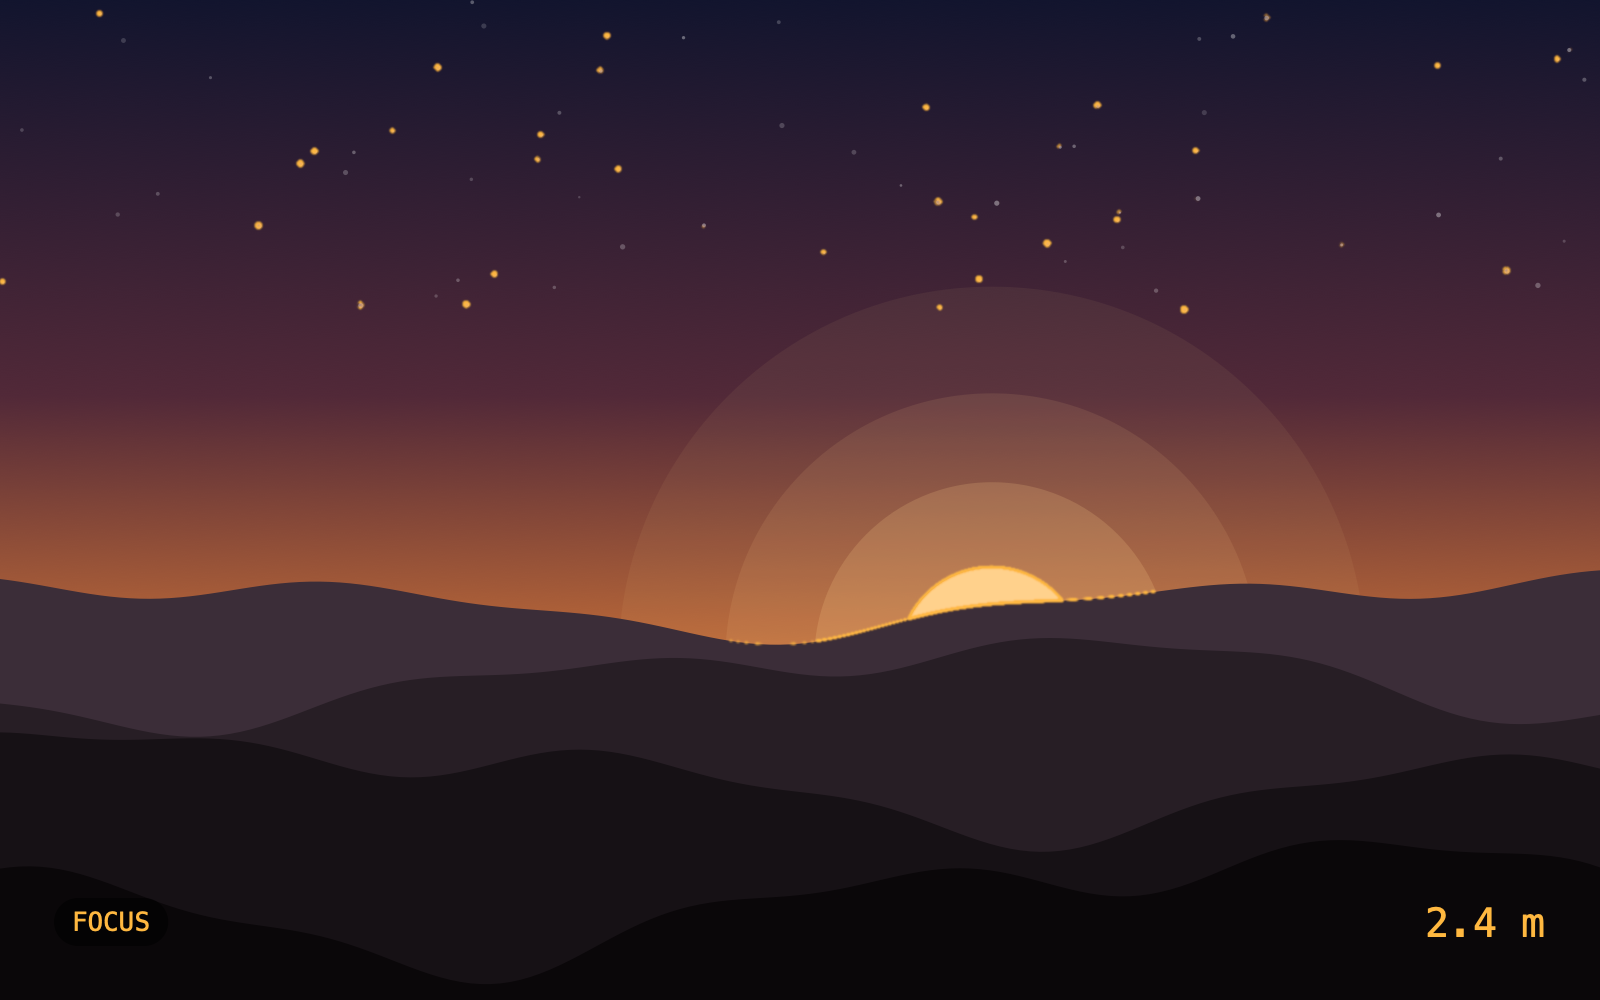
While the focus dial is active, focus peaking paints a thin amber fringe on the edges that are actually sharp. Turn the dial until the fringe lands on your subject; when it sits on the wrong ridge, so does your focus.
One tap. Two files.
The DNG is the sensor readout itself, for the edit. The HEIF is one frame developed by the hardware ISP, for the share. Write both, or either one; the file line always says which.
Where they go: straight into your Photos library. LibreCam has add-only access, so it can save photos but never read, change or delete what is already there.
Which to use: if you will edit, keep the DNG and develop it yourself. If you will share now, the HEIF is finished the moment it lands. Shooting both costs storage, not quality.
Looks develop. They never destroy.
A look is a fixed color recipe applied to the HEIF at capture time and shown live in the viewfinder. The DNG is never touched, so every edit you might want later is still possible.
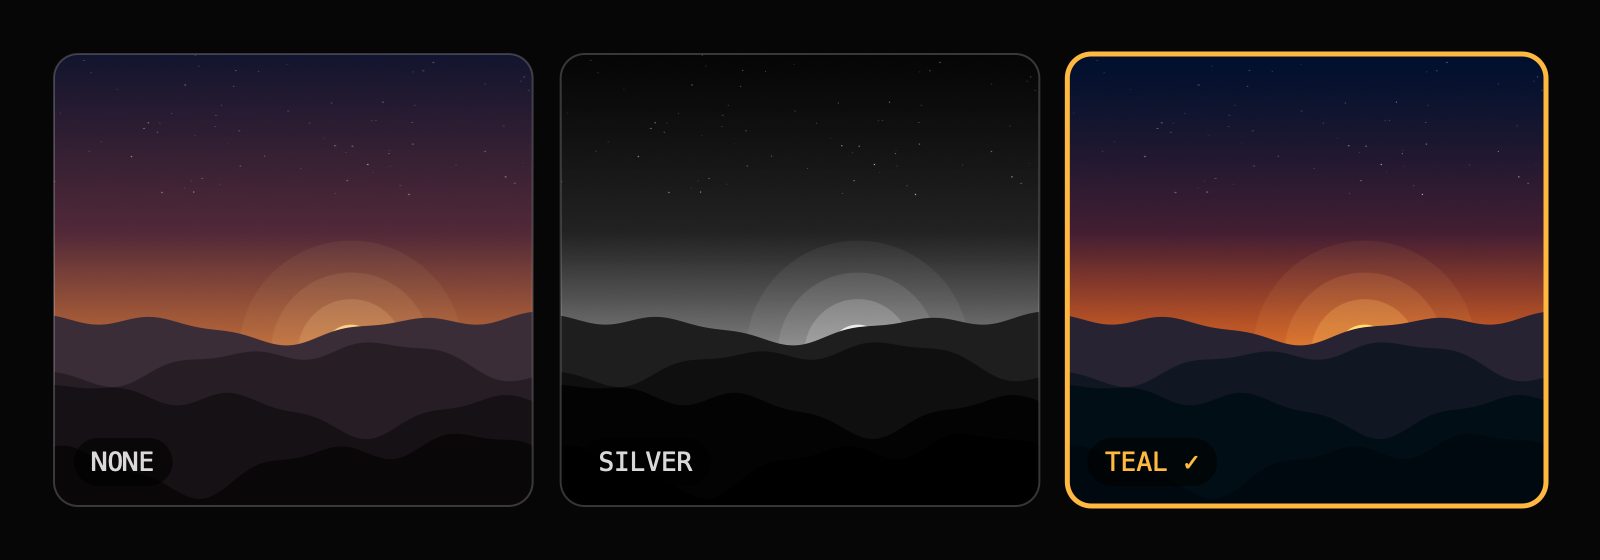
Nine looks are free. The Look Editor, part of LibreCam Pro, builds your own from dials and imports and exports standard .cube files.
The camera on your wrist.
The Apple Watch remote is the modern cable release: the shutter with your live readouts on one page, a framing assist preview on the other. Made for tripods, group shots and long exposures, where touching the phone is exactly what you do not want.
The remote works while LibreCam is open in the foreground on the iPhone; the watch app tells you when it is not. It is part of LibreCam Pro.
What a raw file really is.
A sensor does not see color. Each pixel sits behind a single red, green or blue filter and records one brightness value. A raw file stores exactly that mosaic; the full-color image only exists after your editor demosaics it.
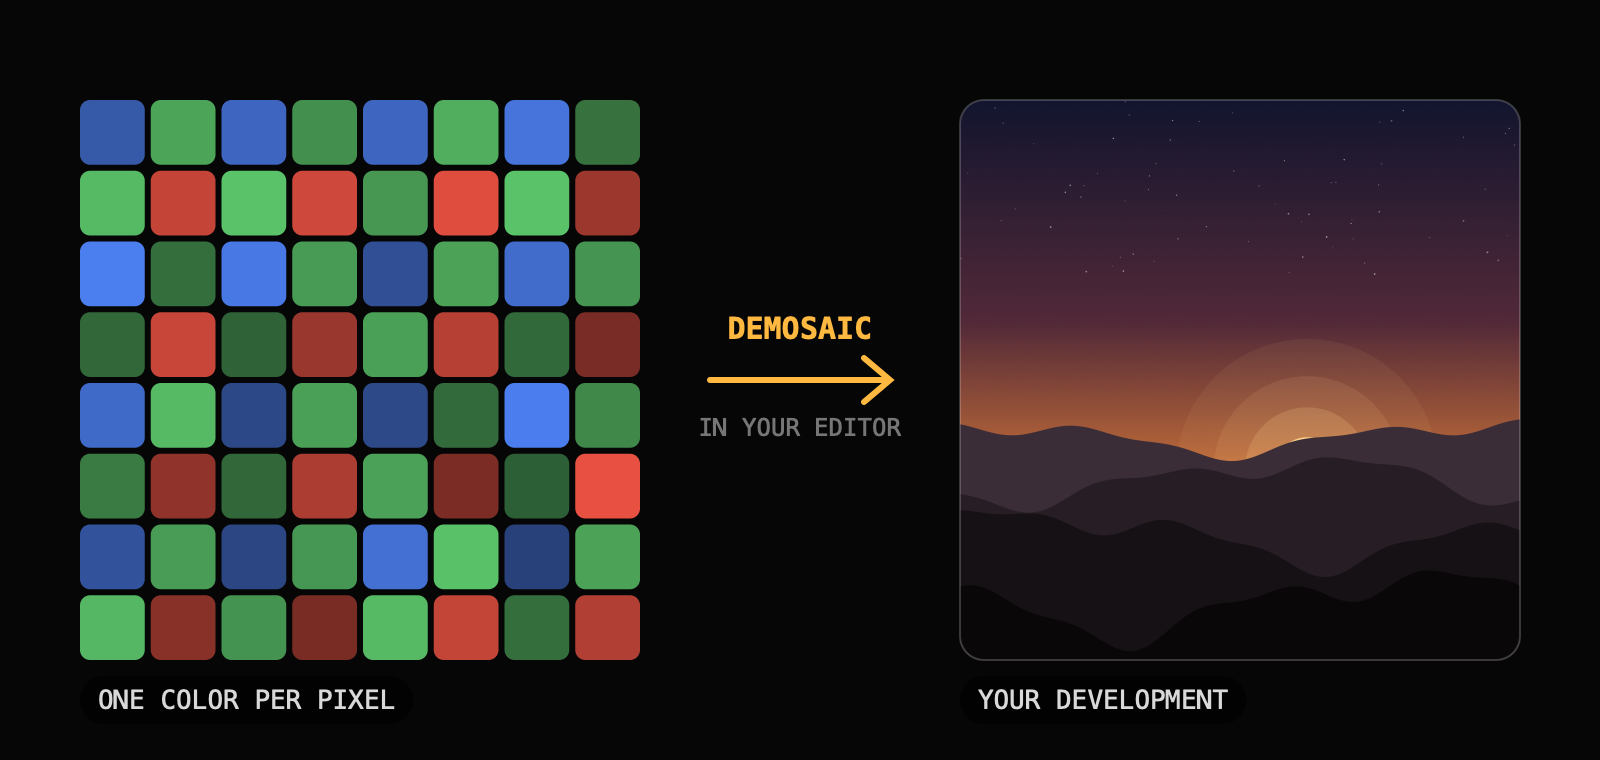
So raw looks flat on purpose. No contrast curve, no sharpening, no noise reduction has been applied yet. That is not a defect, it is headroom: those decisions are still yours to make.
White balance is a note, not a change. In a raw file the white balance you set is stored as metadata next to the readings. You can change your mind completely in the edit, which is impossible once a JPEG or HEIF is baked.
Expose for the highlights.
A raw file forgives dark shadows: you can lift them in the edit and find real detail. It never forgives clipped highlights: once a pixel hits its ceiling, the value is gone and no editor can invent it back.
So when a scene has both, protect the bright side. Pull the EV dial down until the sky holds, and lift the shadows later from the DNG. LibreCam's readout warns when the meter clips, which is your cue to give back some exposure.
The exposure trade.
Shutter and ISO buy the same brightness with different currencies. A slow shutter gathers real light and stays clean but needs stillness. A high ISO amplifies what little was gathered, and amplifies the noise with it.
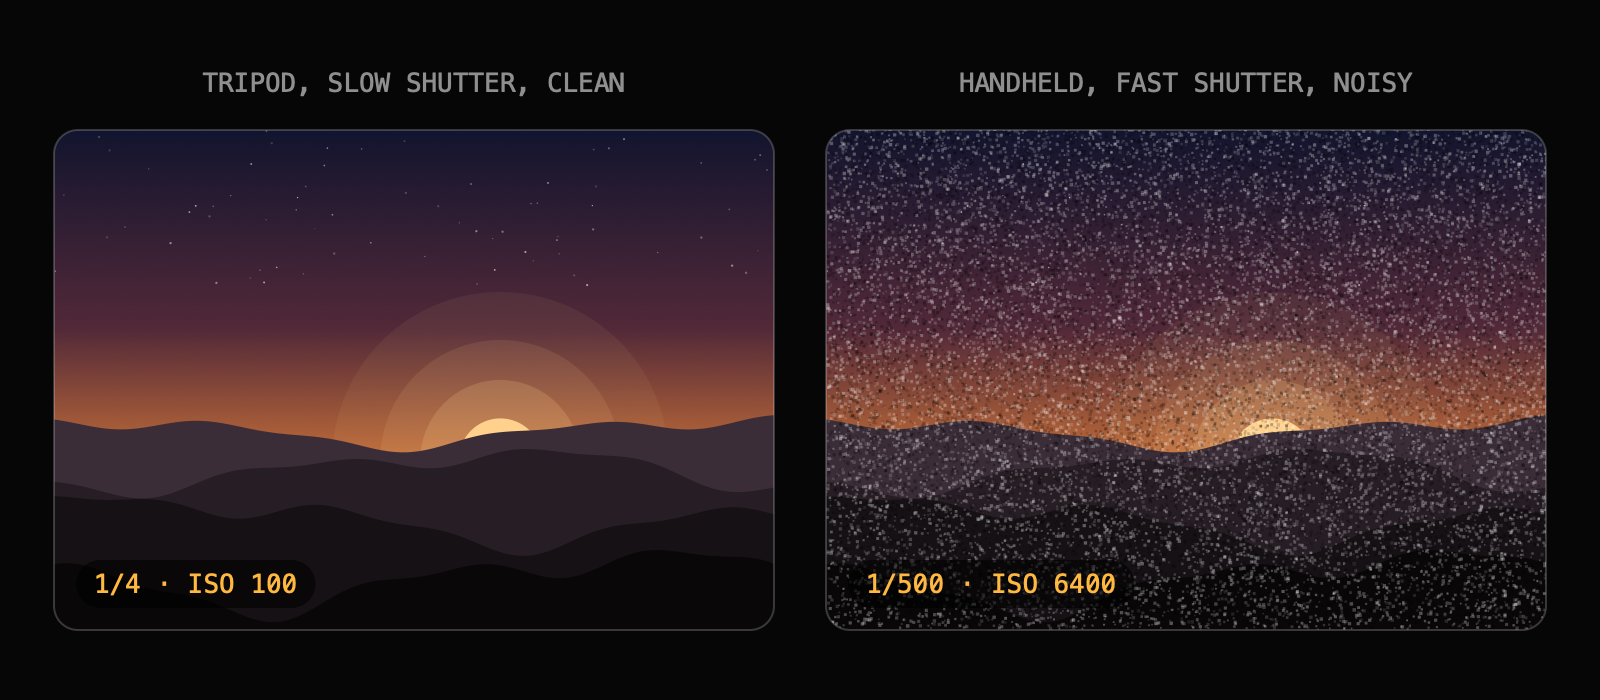
The craft: keep ISO at base whenever the scene allows and pay with shutter time instead. Put the phone on a tripod, pin a slow shutter, and fire from the watch remote so your finger never shakes the frame.
Compose, then press.
The thirds grid earns its place: horizons on a line, subjects on a crossing. And the lens changes the picture more than any slider, a 13 mm stretches the foreground wide while a 77 mm compresses ridges into layers. Walk, switch, then shoot.
Quick answers.
- Why does my DNG look different from the HEIF?
- The HEIF was developed by the ISP and carries your look. The DNG is undeveloped sensor data; it is supposed to look flat until you develop it.
- Why is there no DNG from the front camera?
- The front camera's pipeline does not offer a Bayer readout, so it writes HEIF only. Whether selfies mirror is your choice, in settings.
- What do I develop a DNG with?
- Any raw editor: the Photos app can edit DNGs, and so can Lightroom, Capture One, Darkroom and the rest. The file is a standard Adobe DNG.
- Why are the files so big?
- A Bayer DNG stores every sensor reading uncompressed by fancy tricks, typically tens of megabytes. That size is the headroom you edit with.
- Why no 48 megapixels?
- The 48 MP sensor is a quad-pixel design: each colour filter sits over a block of four photosites, and what the sensor actually reads out is a 12 MP Bayer mosaic. Turning that into 48 MP means recomputing the colour, which only happens inside Apple's image processor. Apple offers 48 MP through ProRAW and the processed HEIF, both already developed, and never hands an app the raw signal at that size. Measured on an iPhone 15 Pro: under LibreCam's unprocessed profile every 48 MP request comes back at 12 MP, for RAW and HEIF alike. A switch would promise what the phone cannot deliver, so there is none.